How to Launch an App: A 15-Step Guide to a Successful App Launch
As of the second quarter of 2022, there are about 3.5 million mobile apps hosted on Google Play and about 2.2 million apps on the Apple App Store. Quite a lot, right? But in fact, it is not as straightforward and easy to launch a mobile app as it may seem.
Can you launch an app by yourself?
Yes, it’s quite possible to launch an app on your own, especially if it is a small, lightweight app. But it’s not enough to just build and launch an app. You have to be competitive and stand out from the millions of mobile apps in the industry. You need a working strategy that is thought out to the smallest detail to ease the path to success. App launch strategy has a significant impact on user acquisition and retention. It is a marketing effort that requires extensive research and ongoing work to achieve results.
Before you launch your first mobile app, we recommend that you get familiar with the key stages of this process and be aware of common mistakes beforehand. In this article, we are going to guide you through each stage of the app launch procedure.
Step #1: Defining the goal
Before starting a detailed conversation about the costs, functionality, and technology stack, it is crucial that you define a business goal. All further stages depend on the chosen goal:
- the budget for achieving this goal,
- the choice of functions for the first version of the app,
- the cost and terms of the app development, etc.
Firstly, determine what the app should achieve and by what date. How much will you earn with it, how will customer recognition or loyalty increase, how will you measure the achievement of the goal?
The second question is – what budget are you ready to invest in this? If the goal helps to find out which features and technologies are going to be used in the app, then the budget dictates what to abandon.
Step #2: Defining the target audience
It is important to understand the app’s target audience, what functionality is critical, how competitors’ apps work, and what processes the app should help to automate. You might need to conduct a survey or pay a marketing consultant. But without this, there is a risk of creating an app with dozens of unnecessary features.
Additionally, you should determine whether it is a B2B or B2C app. There are mobile apps for clients: with their help, people buy goods, order services, and use their personal accounts. There are also apps and tools (e.g. Sparkbay) for employees to automate business processes in a company or provide employees with the ability to resolve issues remotely.
At this stage, you also need to identify possible influencers and brand ambassadors. Create a list of all influencers who might be interested in reviewing your app. Connect with them on social media and start a conversation to nurture a relationship before sending them a pitch. These people will help you spread the word about your product after its release.
Step #3: Thinking of the basic functionality
Often, mobile apps are born gradually – first, a demo version with simplified functionality is released (soft launch), and then new features are launched in subsequent releases. The developers collect feedback from users and understand what to focus on in further development, and in the most positive outcome, they can even get a minimum profit. From a marketing point of view, it is important to outline the basic distribution model here, because the main pages of the app itself depend on this.
Step #4: Defining the marketing strategies
An app will only be successful if it is downloaded and used. It is crucial that you start the marketing efforts before the launch. Working out a strategy for promoting the app will show you an approximate volume of future investments. The marketing of your app typically consists of the following components:
- Pre-launch/awareness – target audience research, preparation of promo materials and landing pages, content marketing.
- Post-launch/acquisition – ASO, app reviews, paid marketing, referral marketing, influencer marketing.
- Engagement and retention – onboarding, deep linking, push notifications, marketing automation, communities, gamification, social connections.
- Monetization/revenue.
There are several ways an app can help you make money:
- Directly: advertising, domestic purchases, premium features, paid subscription.
- Indirectly: Attraction of new clients, increasing the loyalty of existing customers, automation of business processes.
Keep in mind that in some cases app stores charge an impressive commission for user purchases, which can affect the project’s payback period.
Step #5: Creating user stories and journey maps
User stories are step-by-step descriptions of how the user behaves in the app – for example, login, view the catalog, place an order, and make a purchase. Such a story describes both the user’s task, which they solve with the help of the app and their ultimate benefit. As a result, you get a list of requirements that allows you to define the future app’s functionality and make it as user-friendly as possible.
Let’s say that you want to create an app with which you can print photos as a photo album. The main user stories will be:
- creating an account,
- choosing photos from a photo gallery,
- choosing an album size,
- paying for the album,
- accessing the order history.
The journey map allows you to visualize how different characters will use the app in each of the user stories. On such a map, you can see the entire path of the user, as they move between screens and tap the interface elements. The journey map helps you understand how to technically implement all of the app’s functions.
Step #6: Defining the technology stack
You should choose the technology stack for your app depending on which category it will belong to, specifically:
- Native apps. For each platform, typically iOS and Android, mobile apps are developed in their native programming language. It is more expensive and longer, but such apps work faster, they are easier to maintain and develop, and there are almost no restrictions on design and functionality.
- Cross-platform apps. Developers build a single app for all platforms at once, and then adapt it for uploading to the app stores. Such apps are built from templates, which makes them all look the same. It is not possible to implement all of the desired functionality for cross-platform apps, and not all functions will work correctly on all platforms.
- Web view. A website page is loaded in the app window. Sometimes service pages are opened in this way to save on development time, for example, the text of the user agreement. In some cases, the entire app consists of one screen, on which the mobile version is loaded. Each click on the link loads a new page, so the interface feels unresponsive.
- Hybrid apps. Developers use several technologies at once: some of the functions are implemented natively, other sections are cross-platform, and some screens are loaded into the web view. Apps are rarely made initially hybrid. It typically happens over time, when different developers work on different versions, and new functions appear without regard to the existing technology stack.
Step #7: Calculating the budget and deadlines
How much does it cost to launch an app? The cost depends on the following:
- technology stack,
- the need for integration with external services,
- the number of platforms (iOS, Android, or all together),
- and the complexity.
Here are the average market prices as of 2022:
- A cross-platform app for two platforms (Android and iOS): around $15,000-$20,000
- A native app for a single platform (Android or iOS): starting from $30,000
- Native apps for two platforms (Android and iOS): starting from $60,000
- An app for a big e-commerce store for two platforms (Android and iOS): starting from $80,000
As for the time, it takes at least 3 months to create a mobile app. This is the shortest estimation. Here is the approximate timeline of the project:
- interface design – 10 days,
- creation of a design concept – 10 days,
- design of all screens of the app and preparation for development – 10 days,
- writing technical specifications and requirements for integrations – 5 days,
- development and testing – at least 30 days,
- preparation for publishing in app stores and passing of moderation – 5 days.
Total: 3 months and 1 week.
Additionally, it will cost you $25 to publish the app on Google Play and $99 a year – on the Apple App Store.
It is also possible to save development costs without any quality losses, and here is how:
- Do not add extra functionality. Apps often have features that seem cool but are not really needed. To minimize the budget, at the start there should be only the critical functions that solve the main task of the app. For example, a food delivery app requires a payment system and integration with an online store. But you can definitely do without reviews or displaying the courier icon on the map at the start.
- Replace complex solutions with simple ones. Some functions do not need any development – you can use simple and ready-made solutions. For example, you may want a chat in the app. It seems that it is simple, but in fact, developing a really convenient chat takes a long time, is difficult and expensive. It is much better to leave a link to a chat app or incorporate a ready-made feature. Another example: payment directly in the app. You can simplify it by making a payment through the website so that a confirmation window opens inside the app. It is fast, user-friendly, and much cheaper than the integration with payment systems.
There are also project stages on which it seems that you can save money, but we do not recommend doing this:
- Design. Even perfect functionality will not work if the app is hard to use. In design, you cannot ignore the principles of interface development – the app will look cheap and the users will not like it.
- Testing. To save money, there is a temptation to skip this stage: everything seems to be working, everything is fine, the app is ready for release. But it is actually impossible to do this: in the course of work, some critical errors and security loopholes may be revealed, which will bring large losses to the company. And no one will use an app that constantly breaks down. Testing is extremely important work that must be carried out at each stage of development. After all, the quality of the final product depends on testing, as well as its full compliance with the concept and functional requirements. The deadline also depends on the detection of bugs and inconsistencies, which can take a long time if you do not do it regularly.
Step #8: Design and prototyping
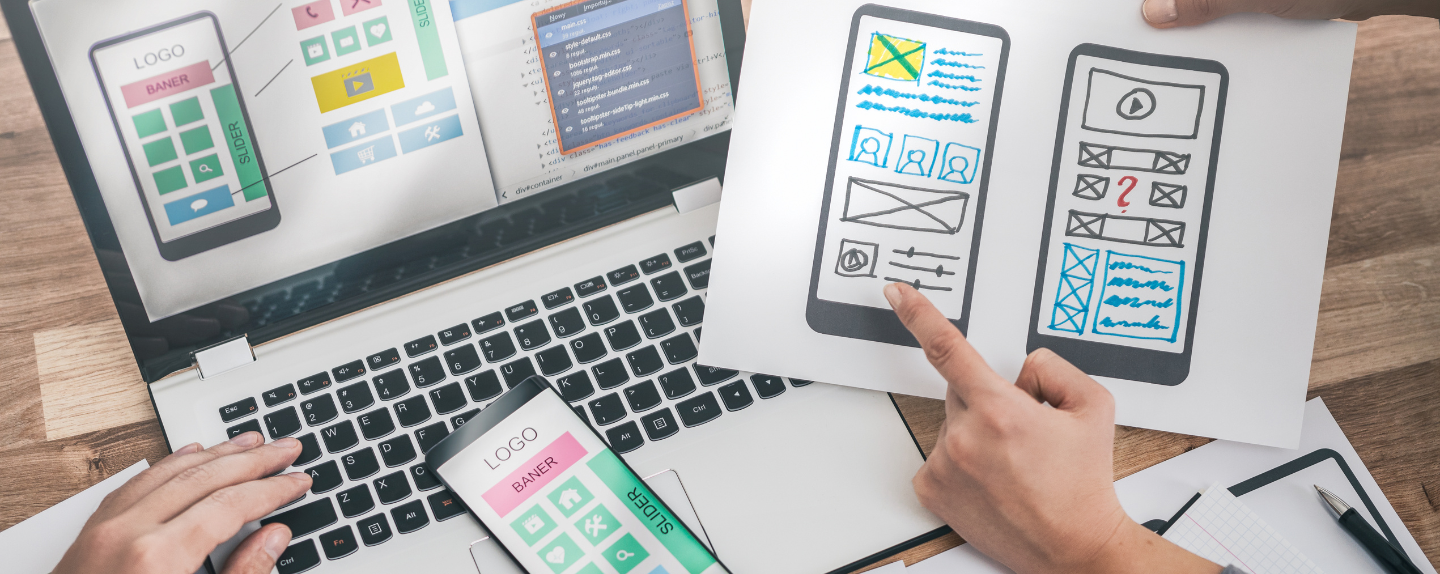
When the analyst gives the designer the wireframes of the graphical interface, visual design starts. It includes drawing a map of screens, graphic elements, and a detailed prototype that considers various use cases.
At this stage, the UI/UX designer creates both the static and interactive prototypes of the app. This shows how the app will look and behave, taking into account the planned features. A prototype is also called an MVP – a minimum viable product.
The key benefit of prototyping is the ability to identify the gaps and tweak the app flow for better usability. An MVP will allow you to gather open feedback from the users at the early stages of development.
Step #9: Development
The development team writes code to implement the intended behavior of the app and wire the app logic to the back end, if provided. It also embodies the finished design in the code by writing all of the styles and UI elements with which the app user will be interacting.
During the development, the designers can check how well the developers have implemented the screenshots of the app: whether all the styles correspond to the selected ones, whether the proper color is selected, what is the aspect ratio, how the corners are rounded, etc.
Step #10: Testing and stabilization
At this phase, bugs are identified and fixed and the product is stabilized: everything is brought into perfect working condition for release. Quality assurance specialists check the app’s performance on different devices and also use special services to test the app on different operating systems.
A mistake in a mobile app release can cost you a lot. Apps appear on Google Play within a few hours, and on the App Store – within several weeks. Errors cause strong negative reactions, users leave low ratings and bad reviews. As a result, new users see this and do not install the app. Therefore, this stage is crucial in the mobile app launch process.
Step #11: Beta release
Before you upload your app to the app stores, we strongly recommend making its pre-final version available to a selected group of beta testers. You can either share this version with the testers or use specialized tools, which were created specially for beta testing of new apps in the stores. These are Google Play’s Play Console and Apple’s TestFlight. The purpose of a beta test is to fix the last-minute issues several weeks before the final launch.
Step #12: Publishing in the app stores
Besides the need to compile the version, it is also necessary to prepare information for publishing. This process is very important for making a mobile app stand out from the competition as well as for app store optimization purposes.
It is better to start preparing in advance in order to have time to analyze the competitors and create your own content, which consists of the following:
- title,
- short description,
- detailed description,
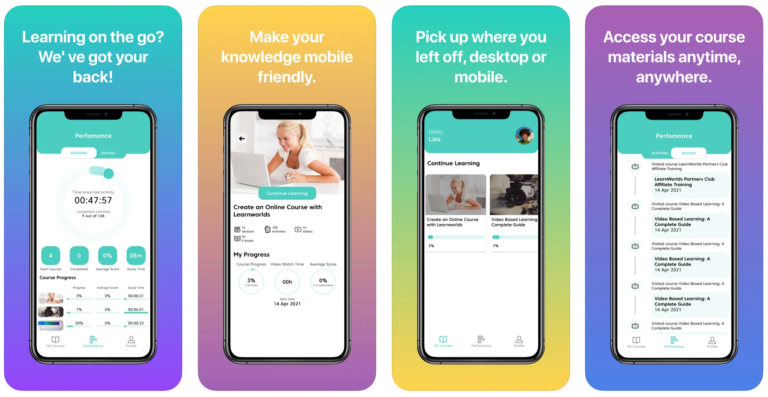
- high-quality screenshots with titles,
- properties,
- privacy policy,
- and, if desired, a video or animation.
To pass the moderation successfully, you also need to follow the rules and guidelines of each platform. The moderation process takes on average 3 days on the App Store and 1 – 2 days on Google Play.
How to launch an Android app on the Google Play Store
- Create a developer account in the Google Play Console and create a Google Account under the name of your company
- Pay for the account by bank card, fill in the developer’s details, and complete the registration.
- Provide information about the app: content and distribution.
- Upload marketing materials: text and graphics.
- Upload the build to Google Play Console.
- Define the privacy policy.
- Configure content for sale, such as subscriptions and in-app purchases.
- Send the build to Google Play.
How to launch an iOS app on the App Store
- Create a developer account. An Apple developer account costs $99 per year. When you have one, you can use App Store Connect to manage your apps.
- Finalize the app. Test it on as many iOS devices as possible for memory leaks, performance issues, and crashes.
- Meet the prerequisites. Before submitting the program to the App Store, you need to obtain a distribution certificate, create a review provision profile, and get an app ID.
- Set up the app in App Store Connect by filling in the appropriate fields: icons, screenshots, app name, category, description, keywords, etc. After all the checkboxes are selected and the necessary edits are made, you can send your app for moderation.
- Wait. The Apple Review Team will need some time to review the app, and in the meantime, it will have the “awaiting verification” status. The process itself takes a few days, after which you’ll receive a message with the results of the review.
Step #13: Notifying your target audience
After the approval of your app, it is time to notify the community that it is finally out there. In addition to a standard press release, it is a good idea to inform everyone in person.
During the research of the target audience, you should already have created a contact list of potential app users and influencers. Notify them about the release, e.g. create an email newsletter encouraging them to try the app. In such a way you will nurture customer loyalty that you have already started building before the launch date.
Step #14: Recording the metrics
After the release, it is crucial to understand that the product is interesting to the target audience. To do this, it is necessary to track important metrics and, based on the data obtained, make decisions on further actions. Here are some popular metrics that you can track:
- Retention Rate – shows how many users are returning to the mobile app.
- Churn Rate – provides the percentage of users who stopped using the app.
- Daily Active Users (DAU) – identifies users who interact with the app every day.
- Monthly Active Users (MAU) – identifies users who have used the app at least once in the last 30 days (month).
- Stickiness – shows how often users return to the app.
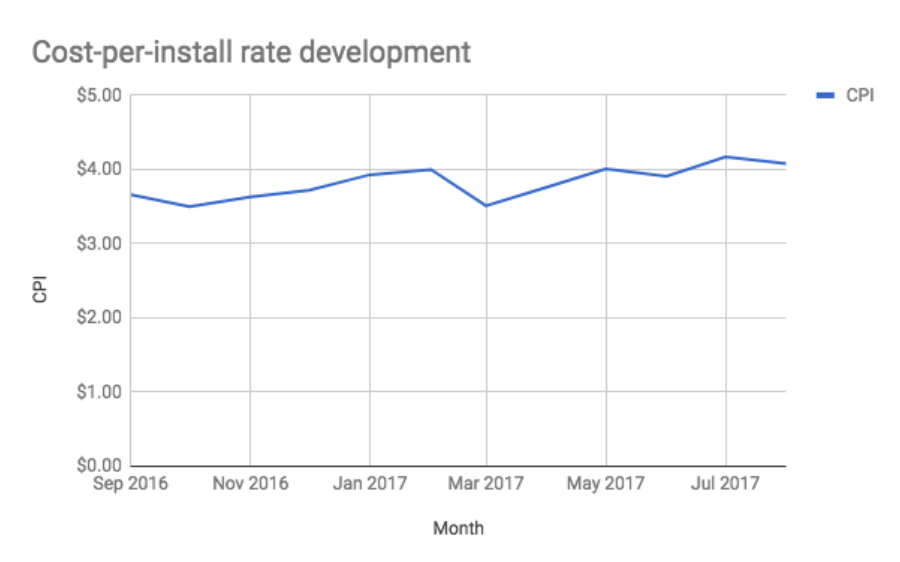
- Cost Per Acquisition (CPA) – determines the efficiency of advertising campaigns.
- Lifetime Value (LTV) – helps to understand what value you can obtain from one average app user at all times.
- Return on Investment (ROI) – defines the return on investment in marketing in general or some specific advertising campaign.
Step #15: Further development and support
After the launch, the story of a mobile app has not ended once and for all: you have to monitor the market, adjust to it, and invest in further development. The minimum effort is the launch of updates and bug fixing: such measures allow you to eliminate the flaws that were missed during testing and to prepare the app for the current market requirements.
It is also important to engage in analytics: analyzing the audience and its actions will help invest in the development of only the most wanted features. You need to work hard to attract users, collect all of the metrics and analyze user behavior. If you use push notifications, it will be easier to understand the habits and needs of users with the help of user segmentation.
Summary
An app launch is a complex multistage process. Each stage depends on the app and its complexity, but you should always consider the most important points, such as the target audience, marketing efforts, budget, prototyping, development, testing, etc.